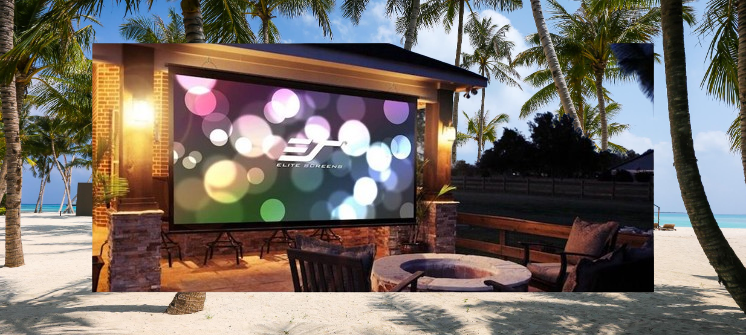
The best outdoor projector screen for most backyards is a 100 to 120 inch, 16:9 screen on a freestanding frame, with a matte white or slightly high-gain surface and proper stakes or guy lines for wind. Inflatable screens suit bigger crowds and quick setups, fixed frames suit permanent patios, and a tensioned fabric screen is the budget pick.
Get three things right and the rest falls into place: size the screen to your seating distance, match it to your projector’s real brightness, and anchor it properly. This guide walks through screen types, sizing, materials, projector brightness, setup and storage so your first movie night works the way you pictured it.
Types of Outdoor Projector Screens
| Type | Best for | Setup time | Main drawback | Rough price range |
|---|---|---|---|---|
| Fabric screen (hang or stretch yourself) | Tight budgets, occasional use | 10 to 20 min | Wrinkles and sagging unless tensioned well | Under $100 |
| Freestanding frame screen | Most backyards | 15 to 30 min | Takes some assembly each time | About $100 to $400 |
| Inflatable screen | Large groups, events | 5 to 10 min | Fan noise, wind sensitivity | About $150 to $600 and up |
| Pull-down or retractable screen | Covered patios and porches | Seconds once installed | Needs a fixed mounting point | About $100 to $500 |
| Permanent fixed frame | Dedicated outdoor theaters | Installed once | Must be weatherproofed or covered | Often $500 and up |
Prices are broad ranges that vary with size, brand and retailer, so treat them as a way to compare categories rather than a quote.
Fabric Screens
A plain fabric screen with grommets around the edge is the cheapest way to start. You tie or bungee it to a fence, a pair of posts, or the side of a garage. The quality of the picture depends almost entirely on how evenly you tension it: every wrinkle shows up as a shadow line across the image. Bungee cords pulled evenly from each grommet work better than rope, and a screen with a black backing will look much brighter than one that lets light pass through.
Freestanding Frame Screens
A frame of aluminum or steel tubes holds a stretched screen that snaps or ties onto it. The tension keeps the surface flat, which gives a sharper image than a loosely hung sheet. Look for legs with ground stakes, included guy ropes and a carry bag that holds everything. This is the best all-round choice for families who set up a few times a month, and most models can be assembled by one person once you have done it a couple of times.
Inflatable Screens
A blower fan inflates a frame around the screen in minutes, and very large sizes are available. They look impressive and pack down small, but the fan runs throughout the film, so place it behind the screen and nudge the volume up slightly. In anything more than a light breeze an inflatable acts like a sail, so every tether point must be staked. They are a strong choice for community events, school fundraisers and big birthday parties where screen size matters more than perfect flatness.
Pull-Down and Retractable Screens
Mounted under a pergola, porch roof or eave, a pull-down screen is the fastest option in daily use. Choose one rated for outdoor use, or retract it and cover it after every session, because damp and UV exposure shorten the life of indoor screen material. Manual pull-downs are cheaper; motorized versions need a nearby outdoor-rated outlet.
Permanent Fixed-Frame Screens
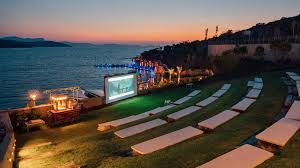
For a dedicated outdoor cinema, a rigid frame bolted to a wall or posts gives the flattest surface and the best picture. It needs weather-resistant materials such as powder-coated aluminum and outdoor-rated fabric, and ideally a cover when not in use. This is the route to take if you have a covered patio you use most weekends through the warmer months.
How to Choose the Right Screen Size
Screen sizes are quoted as a diagonal measurement. For the common 16:9 widescreen format, the width is about 87 percent of the diagonal and the height about 49 percent. A 120 inch screen is therefore roughly 105 inches wide and 59 inches tall. Check that the frame, legs and any black border all fit your space, and leave room either side for guy lines.
| Diagonal (16:9) | Approx. width x height | Comfortable closest row | Suits |
|---|---|---|---|
| 100 in | 87 x 49 in | About 10 to 12 ft | Small yards, 2 to 6 viewers |
| 120 in | 105 x 59 in | About 12 to 15 ft | Typical family movie nights |
| 144 in | 126 x 71 in | About 15 to 18 ft | Larger gatherings |
| 180 in and up | 157 x 88 in and up | About 18 ft and further | Events and big lawns |
A common rule of thumb is to seat the front row at roughly 1.2 to 1.5 times the screen width away. Bigger is not always better: a screen too large for your projector’s brightness will look washed out, and the picture also gets softer as the same number of pixels is stretched over a larger area.
Also think about the bottom edge. Outdoors, people often sit on low chairs or blankets, so raising the bottom of the screen two to three feet off the ground keeps heads in the front row from blocking the view for those behind.
Screen Material and Gain
Gain describes how much light a screen reflects compared with a standard reference surface. Here is how the common options compare:
- Matte white (gain around 1.0): even brightness and wide viewing angles, ideal once it is fully dark and guests are spread across a wide lawn.
- Higher gain (around 1.2 to 1.5): reflects more light toward the center seats, helpful with a modest projector, at the cost of narrower viewing angles for people sitting off to the side.
- Gray surfaces: improve black levels when some ambient light remains, such as porch lights or neighbors’ windows.
- Rear-projection material: lets you put the projector behind the screen, out of the way of guests and the insects drawn to its light.
- Black backing: stops light passing through the screen, which otherwise makes the image dimmer and lets the background show through.
Outdoor fabrics are usually PVC or coated polyester. Look for mildew resistance, UV resistance and a washable surface, and avoid folding sharp creases into the material when storing it, because creases rarely fully relax.
How Bright Should Your Projector Be?
Outdoors, the screen competes with twilight, streetlights and house lights. As a loose guide, a projector in the region of 2,000 to 3,000 ANSI lumens is comfortable for a 100 to 120 inch screen once it is dark, while larger screens or earlier start times need more.
Be wary of unbranded projectors quoting huge “lumen” numbers that are not ANSI lumens, because those figures are often far higher than the real output. Native 1080p resolution is a sensible minimum for sharp text and detail. Also check the throw ratio: it tells you how far back the projector must sit to fill your chosen screen size. A throw ratio of 1.2, for example, means the projector sits about 1.2 feet back for every foot of screen width, so roughly 10.5 feet for a 120 inch screen.
Setting Up for an Outdoor Movie Night
- Pick the spot: put the screen with its back to the brightest light source, on level ground, with the sunset behind the audience if possible.
- Anchor it: stake every leg and use all guy lines, even on calm evenings. Sandbags or water weights work on patios where you cannot stake.
- Position the projector: set it on a stable table at the height of the screen’s center, and use lens shift or keystone correction sparingly, since digital keystone reduces sharpness.
- Sort power safely: use outdoor-rated extension cords and a GFCI-protected outlet, and keep connections off wet grass.
- Plan the audio: built-in projector speakers are rarely loud enough outside. A Bluetooth speaker or soundbar placed near the screen works better, so the sound comes from the picture. Keep volume considerate for neighbors and check any local noise rules.
- Test before guests arrive: check focus, the streaming connection and audio sync at dusk, and download the film in advance if your app allows it.
If you stream to the projector over Wi-Fi, a weak signal in the yard causes buffering mid-film. Our guide to signs your router needs an upgrade can help you diagnose it, and a mesh system such as the one in our eero 7 Pro review extends coverage outdoors. For bigger sound, see our Samsung HW-Q990C soundbar review.
Front Projection vs Rear Projection Outdoors
Most home setups use front projection: the projector sits among or behind the audience and bounces light off the screen. It is simple and works with any standard screen, but people walking past block the image, and the projector’s light draws insects toward the seating area.
Rear projection places the projector behind a translucent screen. Guests can move freely, cables stay out of the way, and the projector is hidden. The trade-offs are that you need a rear-projection or dual-use screen, the projector must be able to flip the image horizontally (most can, in the menu), and you need clear space behind the screen equal to the projector’s throw distance.
Outdoor Screen Buying Checklist
- Measure the space, including room for legs, stakes and guy lines.
- Measure the distance from the front row to the screen and size the screen from that.
- Check your projector’s ANSI lumen rating and throw ratio before picking a size.
- Confirm the surface has a black backing or is opaque.
- Look for stakes, guy ropes and a storage bag in the box.
- Read the care instructions to see whether the fabric is washable and mildew resistant.
Common Mistakes to Avoid
- Buying the biggest screen possible and then finding the projector cannot light it properly.
- Starting the film before it is dark enough, which makes even a good setup look faded.
- Skipping stakes because the evening seems calm, then chasing the screen across the lawn when a gust arrives.
- Relying on the projector’s tiny built-in speaker for an outdoor audience.
- Packing the screen away wet after dew falls, which leads to mildew spots.
Care and Storage
Let a damp screen dry fully before packing it away to prevent mildew. Clean with a soft cloth and mild soapy water only, never solvents or abrasive pads. Roll fabric screens around a tube rather than folding them, and store inflatables loosely in their bag somewhere dry. Screens left up permanently should be covered or retracted between uses to protect them from UV, pollen and bird droppings. Check frame joints and stakes at the start of each season and replace any bent parts before they fail mid-film.
Bottom Line on Outdoor Projector Screens
For most homes, a 100 to 120 inch freestanding frame screen with a black backing, paired with a projector of roughly 2,000 to 3,000 ANSI lumens and a separate speaker, gives the best balance of picture, cost and convenience. Choose inflatable for big events, pull-down for covered patios, and always anchor the screen as if wind is coming.
Frequently Asked Questions
What size outdoor projector screen should I get?
For most backyards, 100 to 120 inches diagonal in 16:9 is the sweet spot. Go larger only if your projector is bright enough and the audience sits further back.
Can I use a white sheet instead of a projector screen?
You can, but sheets wrinkle, let light pass through and look dimmer. A tensioned screen with a black backing gives a noticeably sharper, brighter picture.
Are inflatable projector screens worth it?
They are great for large screens and fast setup, but the fan is audible and they need careful anchoring in wind. Frame screens are quieter and more stable for regular family use.
How many lumens do I need for an outdoor projector?
As a rough guide, around 2,000 to 3,000 ANSI lumens suits a 100 to 120 inch screen after dark. Bigger screens or some remaining daylight need more.
Can I leave an outdoor projector screen up all the time?
Only if it is built for permanent outdoor installation. Even then, covering or retracting it between uses extends its life.
How high off the ground should an outdoor screen be?
Raising the bottom edge about two to three feet off the ground stops heads in the front row from blocking the view. Adjust for whether your audience sits in chairs or on blankets.